
A cool tip to minimize and maximize all your active windows programs. You can do all using your mouse, but if you want to do this with keyboard then simply press Windows key+M to minimize all active programs and later maximize it using Windows key+Shift+M.
If you want to minimize the all active windows programs one by one then use the shortcut by pressing Alt+Space+N keys and sequentially maximize the active windows programs using shortcut Alt+Space+X keys.
Showing posts with label Tips and Tricks. Show all posts
Showing posts with label Tips and Tricks. Show all posts
Close All Windows Programs quickly
Written by symoon on Saturday, April 10, 2010 at 10:06 AM
create digital photo album presentation in PowerPoint
Written by symoon on at 10:03 AM
In Microsoft PowerPoint, you can create a digital photo album of your scanned photographs to represent as slide show presentation. Using this feature, you can display your business photo album on the web. Once you have converted it into HTML document, PowerPoint will allow you to publish this album to the internet. You can create unlimited albums and also add unlimited photos in each album.
Follow the given steps to create a digital photo album of your scanned photographs:
First create a folder of your scanned pictures or transfer from your digital camera or download from the web.
Now click on "Picture" option from the "Insert" menu then click on "New Photo Album" option.

Here a small dialog box will appear with "Photo Album" title. Now click on "File/Disk" button under "Insert picture from" area to add first picture in album.
Here you can add unlimited picture in one album. If you want to get pictures from scanner or camera then click on "Scanner/Camera" button.

Now you can add effects to your pictures, for example rotates picture to different directions, background colors, picture brightness and contrast levels.

Now under "Album Layout" area, you can choose the best picture layout, Frame shape and add design template also for your photos album.
Once you have selected the all required pictures and layouts for your photo album then click on "Create" button to start the process.

Now "Save" the file and then run this photo album in Slide Show.
Restore the Windows Default Icons
Written by symoon on Monday, April 5, 2010 at 5:15 PM
You can restore the all windows default desktop icons, if you accidentally deleted them from your computer desktop.
List of windows default icons.
• My Computer
• Internet Explorer
• My Documents
• My Network Places
• Recycle Bin
Here we are discussing the recovering process of four windows default icons “My Computer, Internet Explorer, My Documents and My Network Places’ and we will cover recovery process of the Recycle Bin icon in next tip.

Fellow the given steps to restore the windows default icons:
• Go to Start Button and open Run then type the given command to open windows Desktop items dialog box.
• Control desk.cpl,,@Web
• Simple copy the above command and paste it in Run box and press Ok,

• Now “Desktop Items” dialog box will appear with different options.
• Under the “General” tab, select the all check box in “Desktop icons” area or click on “Restore default” button to restore the all default icons on your computer desktop.
• Press Ok to close the entire dialog box.
Make Your Windows Fast As Never BeforeMake Your Windows Fast As Never Before
Written by symoon on at 5:10 PM
Disable CD Autorun
( WinXP PRO Only)
2) Go to Computer Configuration, Administrative Templates, System.
3) Locate the entry for Turn autoplay off and modify it as you desire.
Speed Up Browsing
When you connect to a web site your computer sends information back and
forth. Some of this information deals with resolving the site name to an
IP address, the stuff that TCP/IP really deals with, not words. This is
DNS information and is used so that you will not need to ask for the site
location each and every time you visit the site. Although Windows XP and
Windows XP have a pretty efficient DNS cache, you can increase its overall
performance by increasing its size. You can do this with the registry
entries below:
Windows Registry Editor Version 5.00
[HKEY_LOCAL_MACHINE\SYSTEM\CurrentControlSet\Services\Dnscache\Parameters]
"CacheHashTableBucketSize"=dword:00000001
"CacheHashTableSize"=dword:00000180
"MaxCacheEntryTtlLimit"=dword:0000fa00
"MaxSOACacheEntryTtlLimit"=dword:0000012d
Make a new text file and rename it to dnscache.reg. Then copy and paste
the above into it and save it. Merge it into the registry.
DISABLE INDEXING SERVICES
Indexing Services is a small little program that uses large amounts of RAM
and can often make a computer endlessly loud and noisy. This system
process indexes and updates lists of all the files that are on your
computer. It does this so that when you do a search for something on your
computer, it will search faster by scanning the index lists. If you don't
search your computer often, or even if you do search often, this system
service is completely unnecessary. To disable do the following:
1. Go to Start
2. Click Settings
3. Click Control Panel
4. Double-click Add/Remove Programs
5. Click the Add/Remove Window Components
6. Uncheck the Indexing services
7. Click Next
OPTIMISE DISPLAY SETTINGS
Windows XP can look sexy but displaying all the visual items can waste
system resources. To optimize:
1.Go to Start
2. Click Settings
3. Click Control Panel
4. Click System
5. Click Advanced tab
6. In the Performance tab click Settings
7. Leave only the following ticked:
- Show shadows under menus
- Show shadows under mouse pointer
- Show translucent selection rectangle
- Use drop shadows for icons labels on the desktop
- Use visual styles on windows and buttons
SPEEDUP FOLDER BROWSING
You may have noticed that everytime you open my computer to browse folders
that there is a slight delay. This is because Windows XP automatically
searches for network files and printers everytime you open Windows
Explorer. To fix this and to increase browsing significantly:
1. Open My Computer
2. Click on Tools menu
3. Click on Folder Options
4. Click on the View tab.
5. Uncheck the Automatically search for network folders and printers check
box
6. Click Apply
7. Click Ok
8. Reboot your computer
REMOVE THE DESKTOP PICTURE
Your desktop background consumes a fair amount of memory and can slow the
loading time of your system. Removing it will improve performance.
1. Right click on Desktop and select Properties
2. Select the Desktop tab
3. In the Background window select None
4. Click Ok
DISABLE UNNECESSARY SERVICES
Because Windows XP has to be all things to all people it has many services
running that take up system resources that you will never need. Below is a
list of services that can be disabled on most machines:
Alerter
Clipbook
Computer Browser
Distributed Link Tracking Client
Fast User Switching
Help and Support - (If you use Windows Help and Support leave this
enabled)
Human Interface Access Devices
Indexing Service
IPSEC Services
Messenger
Netmeeting Remote Desktop Sharing (disabled for extra security)
Portable Media Serial Number
Remote Desktop Help Session Manager (disabled for extra security)
Remote Procedure Call Locator
Remote Registry (disabled for extra security)
Remote Registry Service
Secondary Logon
Routing & Remote Access (disabled for extra security)
Server
SSDP Discovery Service - (Unplug n' Pray will disable this)
Telnet
TCP/IP NetBIOS Helper
Upload Manager
Universal Plug and Play Device Host
Windows Time
Wireless Zero Configuration (Do not disable if you use a wireless network)
Workstation
To disable these services:
Go to Start and then Run and type "services.msc"
Doubleclick on the service you want to change
Change the startup type to 'Disable"
REMOVE ANNOYING DELETE CONFIRMATION MESSAGES
Although not strictly a performance tweak I love this fix as it makes my
machine 'feel' faster. I hate the annoying 'are you sure?' messages that
XP displays, especially if I have to use a laptop touchpad to close them.
To remove these messages:
1. Right-click on the 'Recycle Bin' on the desktop and then click
'Properties'
2. Clear the 'Display Delete Confirmation Dialog' check box and click 'Ok'
If you do accidently delete a file don't worry as all is not lost. Just go
to your Recycle Bin and 'Restore' the file.
Run Commands In Windows XP
Written by symoon on at 5:06 PM
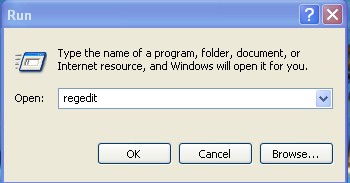
You can access all these programs by going through START/RUN or Simply Click
Windows Key+r
1. Sound Recorder - Sndrec32
2. SQL Client Configuration - cliconfg
3. System Configuration Editor - sysedit
4. System Configuration Utility - msconfig
5. System File Checker Utility (Scan Immediately)- sfc /scannow
6. System File Checker Utility (Scan Once At Next Boot)- sfc /scanonce
7. System File Checker Utility (Scan On Every Boot) - sfc /scanboot
8. System File Checker Utility (Return to Default Setting)- sfc /revert
9. System File Checker Utility (Purge File Cache)- sfc /purgecache
10. System File Checker Utility (Set Cache Size to size x)-sfc/cachesize=x
11. System Information - msinfo32.
12. Task Manager – taskmgr
13. System Properties - sysdm.cpl
14. Task Manager – taskmgr
15. TCP Tester - tcptest
16. Telnet Client - telnet
17. Tweak UI (if installed) - tweakui
18. User Account Management- nusrmgr.cpl
19. Utility Manager - utilman
20. Windows Address Book - wab
21. Windows Address Book Import Utility - wabmig
22. Windows Backup Utility (if installed)- ntbackup
23. Windows Explorer - explorer
24. Windows Firewall- firewall.cpl
25. Windows Magnifier- magnify
26. Windows Management Infrastructure - wmimgmt.msc
27. Windows Media Player - wmplayer
28. Windows Messenger - msmsgs
29. Windows Picture Import Wizard (need camera connected)- wiaacmgr
30. Windows System Security Tool – syskey
31. Windows Update Launches - wupdmgr
32. Windows Version (to show which version of windows)- winver
33. Windows XP Tour Wizard - tourstart
34. Wordpad - write
35. Volume control for soundcard - Sndvol32
36. Password Properties - password.cpl
37. Performance Monitor - perfmon.msc
38. Phone and Modem Options - telephon.cpl
39. Phone Dialer - dialer
40. Pinball Game - pinball
41. Power Configuration - powercfg.cpl
42. Printers and Faxes - control printers
43. Printers Folder – printers
44. Private Character Editor - eudcedit
45. Quicktime (If Installed)- QuickTime.cpl
46. Real Player (if installed)- realplay
47. Records programs crash & snapshots - Drwatson
48. Regional Settings - intl.cpl
49. Registry Editor - regedit
50. Registry Editor - regedit32
51. Remote Access Phonebook - rasphone
52. Remote Desktop - mstsc
53. Removable Storage - ntmsmgr.msc
54. Removable Storage Operator Requests - ntmsoprq.msc
55. Resultant Set of Policy (XP Prof) - rsop.msc
56. Scanners and Cameras - sticpl.cpl
57. Scheduled Tasks - control schedtasks
58. Security Center - wscui.cpl
59. Services - services.msc
60. Shared Folders - fsmgmt.msc
61. Shuts Down Windows - shutdown
62. Sounds and Audio - mmsys.cpl
63. Spider Solitare Card Game - spider
64. Malicious Software Removal Tool - mrt
65. Microsoft Management Console - MMC
66. Microsoft Access (if installed) - access.cpl
67. Microsoft Chat - winchat
68. Microsoft Excel (if installed) - excel
69. Microsoft Frontpage (if installed)- frontpg
70. Microsoft Movie Maker - moviemk
71. Microsoft Paint - mspaint
72. Microsoft Powerpoint (if installed)- powerpnt
73. Microsoft Word (if installed)- winword
74. Microsoft Syncronization Tool - mobsync
75. Minesweeper Game - winmine
76. Mouse Properties - control mouse
77. Mouse Properties - main.cpl
78. Nero (if installed)- nero
79. Netmeeting - conf
80. Network Connections - control netconnections
81. Network Connections - ncpa.cpl
82. Network Setup Wizard - netsetup.cpl
83. Notepad - notepad
84. Nview Desktop Manager (If Installed)- nvtuicpl.cpl
85. Object Packager - packager
86. ODBC Data Source Administrator- odbccp32.cpl
87. On Screen Keyboard - osk
88. Opens AC3 Filter (If Installed) - ac3filter.cpl
89. Outlook Express - msimn
90. Paint – pbrush
91. Keyboard Properties - control keyboard
92. IP Configuration (Display Connection Configuration) - ipconfi/all
93. IP Configuration (Display DNS Cache Contents)- ipconfig /displaydns
94. IP Configuration (Delete DNS Cache Contents)- ipconfig /flushdns
95. IP Configuration (Release All Connections)- ipconfig /release
96. IP Configuration (Renew All Connections)- ipconfig /renew
97. IP Configuration(RefreshesDHCP&Re-RegistersDNS)-ipconfig/registerdns
98. IP Configuration (Display DHCP Class ID)- ipconfig/showclassid
99. IP Configuration (Modifies DHCP Class ID)- ipconfig /setclassid
100. Java Control Panel (If Installed)- jpicpl32.cpl
101. Java Control Panel (If Installed)- javaws
102. Local Security Settings - secpol.msc
103. Local Users and Groups - lusrmgr.msc
104. Logs You Out Of Windows - logoff.....
105. Accessibility Controls - access.cpl
106. Accessibility Wizard - accwiz
107. Add Hardware - hdwwiz.cpl
108. Add/Remove Programs - appwiz.cpl
109. Administrative Tools control - admintools
110. Adobe Acrobat (if installed) - acrobat
111. Adobe Designer (if installed)- acrodist
112. Adobe Distiller (if installed)- acrodist
113. Adobe ImageReady (if installed)- imageready
114. Adobe Photoshop (if installed)- photoshop
115. Automatic Updates - wuaucpl.cpl
116. Bluetooth Transfer Wizard – fsquirt
117. Calculator - calc
118. Certificate Manager - certmgr.msc
119. Character Map - charmap
120. Check Disk Utility - chkdsk
121. Clipboard Viewer - clipbrd
122. Command Prompt - cmd
123. Component Services - dcomcnfg
124. Computer Management - compmgmt.msc
125. Control Panel - control
126. Date and Time Properties - timedate.cpl
127. DDE Shares - ddeshare
128. Device Manager - devmgmt.msc
129. Direct X Control Panel (If Installed)- directx.cpl
130. Direct X Troubleshooter- dxdiag
131. Disk Cleanup Utility- cleanmgr
132. Disk Defragment- dfrg.msc
133. Disk Management- diskmgmt.msc
134. Disk Partition Manager- diskpart
135. Display Properties- control desktop
136. Display Properties- desk.cpl
137. Display Properties (w/Appearance Tab Preselected)- control color
138. Displays IP configuration - Winipcfg
139. Dr. Watson System Troubleshooting Utility- drwtsn32
140. Driver Verifier Utility- verifier
141. Event Viewer- eventvwr.msc
142. Files and Settings Transfer Tool- migwiz
143. File Signature Verification Tool- sigverif
144. Findfast- findfast.cpl
145. Firefox (if installed)- firefox
146. Folders Properties- control folders
147. Fonts- control fonts
148. Fonts Folder- fonts
149. Free Cell Card Game- freecell
150. Game Controllers- joy.cpl
151. Group Policy Editor (XP Prof)- gpedit.msc
152. Hearts Card Game- mshearts
153. Help and Support- helpctr
154. HyperTerminal- hypertrm
155. Iexpress Wizard- iexpress
156. Indexing Service- ciadv.msc
157. Internet Connection Wizard- icwconn1
158. Internet Explorer- iexplore
159. Internet Setup Wizard- inetwiz
160. Internet Properties- inetcpl.cpl
Google Chrome Keyboard Shortcuts.
Written by symoon on Tuesday, March 9, 2010 at 3:19 PM

Here is a complete list of Google Chrome browser keyboard shortcuts for your reference. Only very few shortcuts of Mozilla Firefox were not working with this fine browser. After working few hours one can easily say that it’s the feature.
New Shortcuts:
Task Manager————————————-Shift+Esc
New Incognito Window————————-Ctrl+Shift+N
Reopen the last tab(closed tab)————–Ctrl+Shift+T
Drag link to tab———————– ——Open the URL in tab
Ctrl+1 to 8————————- ———Switch to the specified tab(left to right)
Ctrl+9—————————————Switch to the last tab
Ctrl+Tab or Ctrl+PgDown—- —————Switch to the next tab
Alt+Home—————– ——————Open the home page
Press Ctrl, and click on a link —————–Open the link in a new tab
Press Shift, and click on a link —————-Open the link in a new window
Space bar————————————Scroll down the web page
Regular Shortcuts:
Bookmark This Page—————————–Ctrl + D
Bookmarks—————————————-Ctrl + B
New Incognito Window————————-Ctrl+Shift+N
Downloads—————————————-Ctrl + J
Help———————————————–No keys
History——————————————–Ctrl + H
Page Source————————————–Ctrl + U
Print———————————————–Ctrl + P
Refresh Page————————————–F5
Refresh Page & Cache—————————Ctrl + F5
Save Page As————————————–No keys
Back————————————————Alt + Left Arrow
Down One Line————————————Down
Down One Page———————————–PageDown
File Open——————————————-Ctrl + O
Find in page—————————————-Ctrl+F
Forward———————————————Alt + Right Arrow
Home Page——————————————Alt + Home
Jump to Address Bar——————————-Ctrl + L
Jump to Search Bar(opens search bar in the address bar)–Ctrl + K
Page Bottom—————————————-End
Page Top—————————————— -Home
Press Ctrl, and click on a link —————–Open the link in a new tab
Press Shift, and click on a link —————-Open the link in a new window
Stop————————————————–Esc
Tab Close—————————————— -Ctrl + W
Tab New—————————————— -Ctrl + T
Tab Next——————————————–Ctrl + Tab
Tab Previous—————————————-Ctrl + Shift + Tab
Tab Select——————————————-Ctrl + [1 - 9]
Up One Line—————————————– Up
Up One Page—————————————–PageUp
Window Close—————————————Alt + F4
Window New—————————————-Ctrl + N
Copy————————————————–Ctrl + C
Cut—————————————————-Ctrl + X
Delete————————————————Del
Task Manager—————————————-Shift+Esc
Text Size Decrease———————————Ctrl + -
Text Size Increase———————————-Ctrl + +
Text Size Default———————————–Ctrl + 0
Undo————————————————- Ctrl + Z
Space bar————————————–Scroll down the web page
Computer Usage Time.
Written by symoon on Saturday, February 27, 2010 at 3:04 AM
Know about your Computer Usage time:
- Start then click Run
- Write cmd in the run box and then click Ok.
- Then you see command prompt window. In this window write systeminfo and then press Enter.
- And you see your full system information of computer.

Create a Custom Font in Internet Explorer:
Written by symoon on at 2:57 AM
When we do browsing in internet we see various fonts on Web pages. Some Web pages fonts don’t well to see. In this situation we can change this kind of webpage fonts.
Go to Internet Explorer and click Tools. Then choose ‘Internet Options’.
Then click Fonts in General Tab and select your Fonts and click ok. Which you like to see in Web pages.
Then click Accessibility in General Tab. Then select ‘Ignore Font style specified on Web pages’ and click ok.

And then Ok to close Internet Options.
All keyboard Shortcuts - Computer trickAll keyboard Shortcuts.
Written by symoon on Thursday, February 18, 2010 at 1:30 PM
Windows Shortcuts
- Shift + F10 right-clicks.
- Win + L (XP Only): Locks keyboard. Similar to Lock Workstation.
- Win + F or F3: Open Find dialog. (All Files) F3 may not work in some
applications which use F3 for their own find dialogs.
- Win + Control + F: Open Find dialog. (Computers)
- Win + U: Open Utility Manager.
- Win + F1: Open Windows help.
- Win + Pause: Open System Properties dialog.
- Win + Tab: Cycle through taskbar buttons. Enter clicks, AppsKey or Shift
+ F10 right-clicks.
- Win + Shift + Tab: Cycle through taskbar buttons in reverse.
- Alt + Tab: Display Cool Switch. More commonly known as the AltTab
dialog.
- Alt + Shift + Tab: Display Cool Switch; go in reverse.
- Alt + Escape: Send active window to the bottom of the z-order.
- Alt + Shift + Escape: Activate the window at the bottom of the z-order.
- Alt + F4: Close active window; or, if all windows are closed, open
shutdown dialog.
- Shift while a CD is loading: Bypass AutoPlay.
- Shift while login: Bypass startup folder. Only those applications will
be ignored which are in the startup folder, not those started from the
registry (Microsoft\Windows\CurrentVersion\Run\)
- Ctrl + Alt + Delete or Ctrl + Alt +
Invoke the Task Manager or NT Security dialog.
- Ctrl + Shift + Escape (2000/XP ) or (Ctrl + Alt + NumpadDot) : Invoke
the task manager. On earlier OSes, acts like Ctrl + Escape.
- Print screen: Copy screenshot of current screen to clipboard.
- Alt + Print screen: Copy screenshot of current active window to
clipboard.
- Ctrl + Alt + Down Arrow: Invert screen. Untested on OS's other than XP.
- Ctrl + Alt + Up Arrow: Undo inversion.
- Win + B : Move focus to systray icons.
General
- Ctrl + C or Ctrl + Insert: Copy.
- Ctrl + X or Shift + Delete: Cut.
- Ctrl + V or Shift + Insert: Paste/Move.
- Ctrl + N: New... File, Tab, Entry, etc.
- Ctrl + S: Save.
- Ctrl + O: Open...
- Ctrl + P: Print.
- Ctrl + Z: Undo.
- Ctrl + A: Select all.
- Ctrl + F: Find...
- Ctrl + W : to close the current window
- Ctrl + F4: Close tab or child window.
- F1: Open help.
- F11: Toggle full screen mode.
- Alt or F10: Activate menu bar.
- Alt + Space: Display system menu. Same as clicking the icon on the
title bar.
- Escape: Remove focus from current control/menu, or close dialog box.
General Navigation
- Tab: Forward one item.
- Shift + Tab: Backward one item.
- Ctrl + Tab: Cycle through tabs/child windows.
- Ctrl + Shift + Tab: Cycle backwards through tabs/child windows.
- Enter: If a button's selected, click it, otherwise, click default
button.
- Space: Toggle items such as radio buttons or checkboxes.
- Alt + (Letter): Activate item corresponding to (Letter). (Letter) is the
underlined letter on the item's name.
- Ctrl + Left: Move cursor to the beginning of previous word.
- Ctrl + Right: Move cursor to the beginning of next word.
- Ctrl + Up: Move cursor to beginning of previous paragraph. This and all
subsequent Up/Down hotkeys in this section have only been known to work
in Rich Edit controls.
- Ctrl + Down: Move cursor to beginning of next paragraph.
- Shift + Left: Highlight one character to the left.
- Shift + Right: Highlight one character to the right.
- Shift + Up: Highlight from current cursor position, to one line up.
- Shift + Down: Highlight from current cursor position, to one line down.
- Ctrl + Shift + Left: Highlight to beginning of previous word.
- Ctrl + Shift + Right: Highlight to beginning of next word.
- Ctrl + Shift + Up: Highlight to beginning of previous paragraph.
- Ctrl + Shift + Down: Highlight to beginning of next paragraph.
- Home: Move cursor to top of a scrollable control.
- End: Move cursor to bottom of a scrollable control.
File Browser
- Arrow Keys: Navigate.
- Shift + Arrow Keys: Select multiple items.
- Ctrl + Arrow Keys: Change focus without changing selection. "Focus" is
the object that will run on Enter. Space toggles selection of the
focused item.
- (Letter): Select first found item that begins with (Letter).
- BackSpace: Go up one level to the parent directory.
- Alt + Left: Go back one folder.
- Alt + Right: Go forward one folder.
- Enter: Activate (Double-click) selected item(s).
- Alt + Enter: View properties for selected item.
- F2: Rename selected item(s).
- Ctrl + NumpadPlus: In a Details view, resizes all columns to fit the
longest item in each one.
- Delete: Delete selected item(s).
- Shift + Delete: Delete selected item(s); bypass Recycle Bin.
- Ctrl while dragging item(s): Copy.
- Ctrl + Shift while dragging item(s): Create shortcut(s).
- In tree pane, if any:
- Left: Collapse the current selection if expanded, or select the parent
folder.
- Right: Expand the current selection if collapsed, or select the first
subfolder.
- Numpad Asterisk: Expand currently selected directory and all
subdirectories. No undo.
- Numpad Plus: Expand currently selected directory.
- Numpad Minus: Collapse currently selected directory.
Accessibility
- Right Shift for eight seconds: Toggle FilterKeys on and off. FilterKeys
must be enabled.
- Left Alt + Left Shift + PrintScreen: Toggle High Contrast on and off.
High Contrast must be enabled.
- Left Alt + Left Shift + NumLock: Toggle MouseKeys on and off. MouseKeys
must be enabled.
- NumLock for five seconds: Toggle ToggleKeys on and off. ToggleKeys must
be enabled.
- Shift five times: Toggle StickyKeys on and off. StickyKeys must be
enabled.
Microsoft Natural Keyboard with IntelliType Software Installed
- Win + L: Log off Windows.
- Win + P: Open Print Manager.
- Win + C: Open control panel.
- Win + V: Open clipboard.
- Win + K: Open keyboard properties.
- Win + I: Open mouse properties.
- Win + A: Open Accessibility properties.
- Win + Space: Displays the list of Microsoft IntelliType shortcut keys.
- Win + S: Toggle CapsLock on and off.
Remote Desktop Connection Navigation
- Ctrl + Alt + End: Open the NT Security dialog.
- Alt + PageUp: Switch between programs.
- Alt + PageDown: Switch between programs in reverse.
- Alt + Insert: Cycle through the programs in most recently used order.
- Alt + Home: Display start menu.
- Ctrl + Alt + Break: Switch the client computer between a window and a
full screen.
- Alt + Delete: Display the Windows menu.
- Ctrl + Alt + NumpadMinus: Place a snapshot of the entire client window
area on the Terminal server clipboard and provide the same functionality
as pressing Alt + PrintScreen on a local computer.
- Ctrl + Alt + NumpadPlus: Place a snapshot of the active window in the
client on the Terminal server clipboard and provide the same
functionality as pressing PrintScreen on a local computer.
Mozilla Firefox Shortcuts
- Ctrl + Tab or Ctrl + PageDown: Cycle through tabs.
- Ctrl + Shift + Tab or Ctrl + PageUp: Cycle through tabs in reverse.
- Ctrl + (1-9): Switch to tab corresponding to number.
- Ctrl + N: New window.
- Ctrl + T: New tab.
- Ctrl + L or Alt + D or F6: Switch focus to location bar.
- Ctrl + Enter: Open location in new tab.
- Shift + Enter: Open location in new window.
- Ctrl + K or Ctrl + E: Switch focus to search bar.
- Ctrl + O: Open a local file.
- Ctrl + W: Close tab, or window if there's only one tab open.
- Ctrl + Shift + W: Close window.
- Ctrl + S: Save page as a local file.
- Ctrl + P: Print page.
- Ctrl + F or F3: Open find toolbar.
- Ctrl + G or F3: Find next...
- Ctrl + Shift + G or Shift + F3: Find previous...
- Ctrl + B or Ctrl + I: Open Bookmarks sidebar.
- Ctrl + H: Open History sidebar.
- Escape: Stop loading page.
- Ctrl + R or F5: Reload current page.
- Ctrl + Shift + R or Ctrl + F5: Reload current page; bypass cache.
- Ctrl + U: View page source.
- Ctrl + D: Bookmark current page.
- Ctrl + NumpadPlus or Ctrl + Equals (+/=): Increase text size.
- Ctrl + NumpadMinus or Ctrl + Minus: Decrease text size.
- Ctrl + Numpad0 or Ctrl + 0: Set text size to default.
- Alt + Left or Backspace: Back.
- Alt + Right or Shift + Backspace: Forward.
- Alt + Home: Open home page.
- Ctrl + M: Open new message in integrated mail client.
- Ctrl + J: Open Downloads dialog.
- F6: Switch to next frame. You must have selected something on the page
already, e.g. by use of Tab.
- Shift + F6: Switch to previous frame.
- Apostrophe ('): Find link as you type.
- Slash (/): Find text as you type.
Gmail Shortcuts
Note: Must have "keyboard shortcuts" on in settings.
- C: Compose new message.
- Shift + C: Open new window to compose new message.
- Slash (/): Switch focus to search box.
- K: Switch focus to the next most recent email. Enter or "O" opens
focused email.
- J: Switch focus to the next oldest email.
- N: Switch focus to the next message in the "conversation." Enter or "O"
expands/collapses messages.
- P: Switch focus to the previous message.
- U: Takes you back to the inbox and checks for new mail.
- Y: Various actions depending on current view:
Has no effect in "Sent" and "All Mail" views.
- Inbox: Archive email or message.
- Starred: Unstar email or message.
- Spam: Unmark as spam and move back to "Inbox."
- Trash: Move back to "Inbox."
- Any label: Remove the label.
- X: "Check" an email. Various actions can be performed against all
checked emails.
- S: "Star" an email. Identical to the more familiar term, "flagging."
- R: Reply to the email.
- A: Reply to all recipients of the email.
- F: Forward an email.
- Shift + R: Reply to the email in a new window.
- Shift + A: Reply to all recipients of the email in a new window.
- Shift + F: Forward an email in a new window.
- Shift + 1 (!): Mark an email as spam and remove it from the inbox.
- G then I: Switch to "Inbox" view.
- G then S: Switch to "Starred" view.
- G then A: Switch to "All Mail" view.
- G then C: Switch to "Contacts" view.
- G then S: Switch to "Drafts" view.
List of F1-F9 Key Commands for the Command Prompt
- F1 / right arrow: Repeats the letters of the last command line, one by
one.
- F2: Displays a dialog asking user to "enter the char to copy up to" of
the last command line
- F3: Repeats the last command line
- F4: Displays a dialog asking user to "enter the char to delete up to" of
the last command line
- F5: Goes back one command line
- F6: Enters the traditional CTRL+Z (^z)
- F7: Displays a menu with the command line history
- F8: Cycles back through previous command lines (beginning with most
recent)
- F9: Displays a dialog asking user to enter a command number, where 0 is
for first command line entered.
- Alt + Enter: toggle full Screen mode.
- up/down: scroll thru/repeat previous entries
- Esc: delete line
Note: The buffer allows a maximum of 50 command lines. After this number
is reached, the first line will be replaced in sequence.
Helpful accessibility keyboard shortcuts
- Switch Filter Keys on and off. Right SHIFT for eight seconds
- Switch High Contrast on and off. Left ALT +left SHIFT +PRINT SCREEN
- Switch MouseKeys on and off. Left ALT +left SHIFT +NUM LOCK
- Switch Sticky Keys on and off. SHIFT five times
- Switch Toggle Keys on and off. NUM LOCK for five seconds.
Create A Microsoft Loopback Adapter.
Written by symoon on Tuesday, February 16, 2010 at 5:28 PM
Today I tell you how you can create a Loopback Adapter. It is a False Network Adapter. Sometimes we need this Adapter in different work (Example: virtual pc).So let’s go to create a Loopback Adapter.
Þ Click Start then click Control Panel.
Þ In this Control Panel then click Add Hardware. When the Add Hardware Wizard is coming then click Next then check mark like this Image below:

Þ Then click Next then choose “Add a new hardware device” like Image below:

Þ Then click Next then check mark like this Image below:

Þ Then click Next then choose “Network adapters” in the common hardware types lists.
Þ Then click Next in the Select Network Adapter wizard choose “Microsoft Loopback Adapter”.

Þ Then click Next then click Next then click Finish.
Subscribe to:
Posts (RSS)
Free Download

Custom Search


